I generally believe in ‘never say never’, but I am not convinced that I will ever be able to take fancy food photos. Mostly because I eat the stuff before I can take a good photo!! And then there is the tiny insignificant detail of not knowing how to take good food photos!
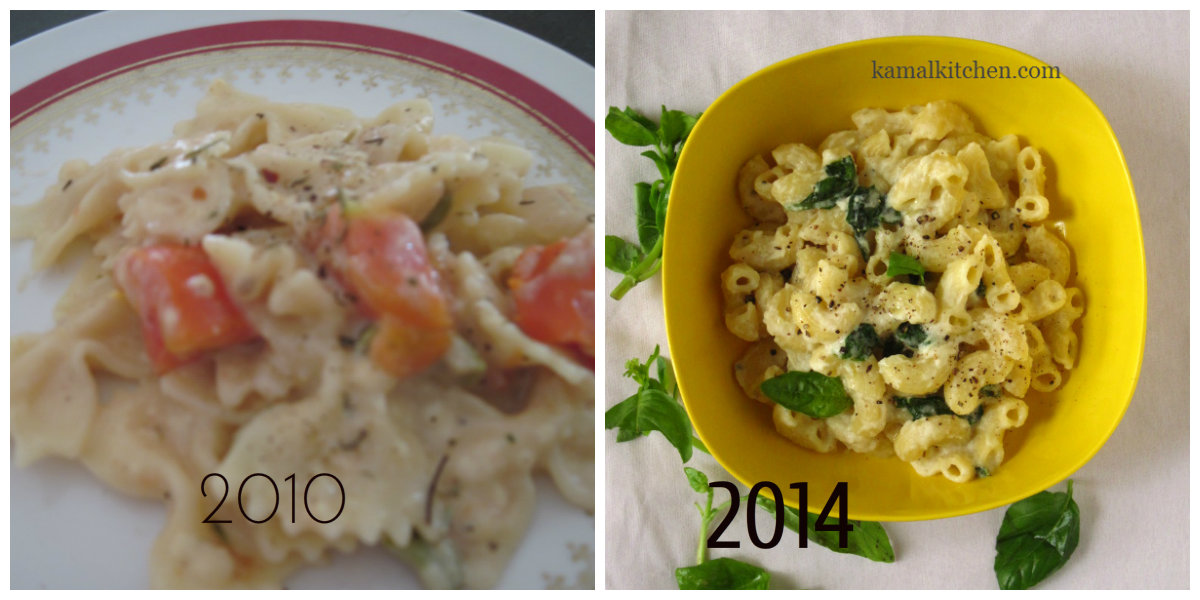
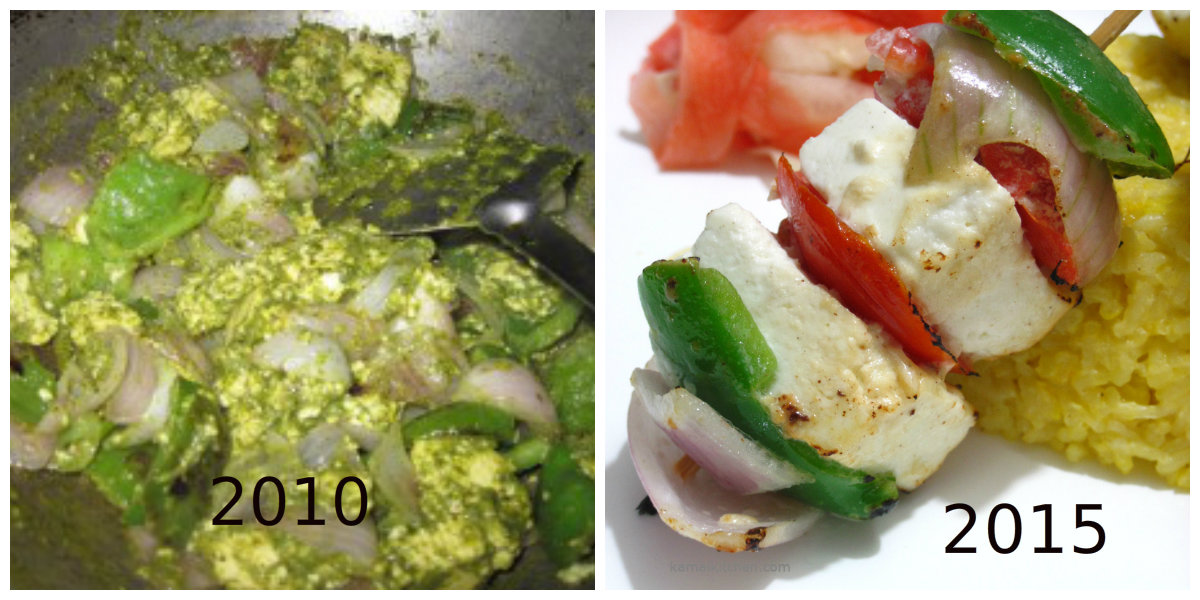
Why am I suddenly talking about photography? It is not sudden. If you have been reading my blog for a while, I hope you noticed that my food photos are improving. I am still not as good as I want to be, but I think I am getting close to the point where I can squeeze the max out of my tiny point and shoot. This is a self imposed condition before I invest in a swanky super expensive DSLR costing the big bucks – 700-800USD for an entry level one.

I am still not sure whether a food blog should focus 100% on good looking photos. The substance or meat matters too, like the actual recipe. Just like a Photoshopped pretty model may not be a good person inside! You know what I mean. Saying this is like stepping on a landmine or sour grapes or something. Thankfully, the focus of this post is something else.
There is too much to talk about here. But I need to start somewhere. I haven’t perfected this art yet, and this is my attempt to document everything that I learn along the way to being good or at least decent at capturing the recipes that I create for my blog.
I had never really dwelt on photography beyond the point-and shoot. My camera experience, began with a Konica camera years ago when we had to go to the studio to get the film installed in the camera.

So having a digital camera is a boon in many ways.
But the basics of photography haven’t changed inspite of the big change in the technology.
To make the best of the point-and-shoot and mobile phone camera, these are some of the settings that I have identified to be crucial. Mind you, not all mobile phone cameras have these options and you need to study the specs in detail if photos are important to you.
1. White Balance
White balance is the shade of the white parts in your frame or shot. An incorrect setting can give the white either a blue shade or a yellow wash. Selecting Auto will be enough most of the time, however, you can also manually select the right setting. For example, if you are capturing images indoors, select Fluorescent, if outside during the day, select Daylight, and if its cloudy, select cloudy.

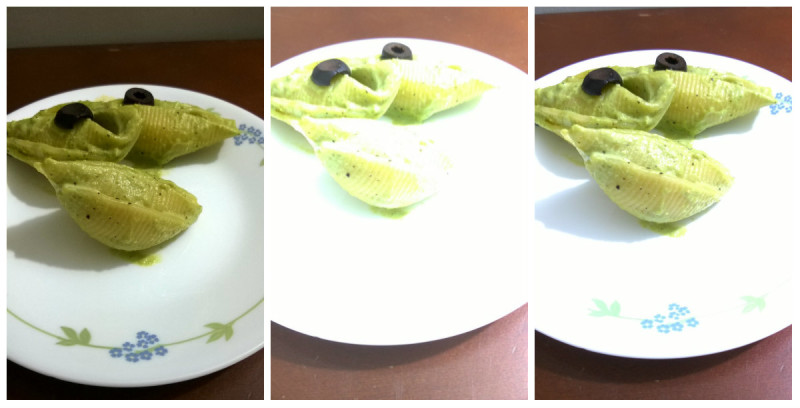
The image above shows photos taken indoors in fluorescent (CFL) with different White Balance settings. The first from left is taken with Auto, the middle one is with Incandescent, and the right most is Fluorescent. Here, because the light source is fluorescent, the one on the right gives the best white shade to the photo. As you can see, selecting Incandescent (yellow bulb) gave a blue hue to the photo as the camera tried to compensate for the yellow glow of the bulb.
Each camera will compensate in a different manner and you will need to try different settings until you find the right one for your camera.
2. Exposure
There are entire books and thousands of articles written about exposure. But there is a reason why photography is an art and not exact science. Every situation is different, every angle is different. What has worked for a certain angle, at a certain place, at a certain time of the day may not work again.
Exposure is the amount of light that goes into the camera lens and in old days exposed the film to the light. It decides how well your photo is illuminated and visible.
Yes, there is an exposure setting. Alas! It can’t be that easy. Photographers don’t use just that one setting to determine the right exposure. Getting the exposure right is an art and depends mainly on three settings: the ISO, the Shutter Speed, and the aperture, which is the portion of the lens that is exposed.
Now a point-and-click digital camera and mobile phone may not have all these settings, but they surely have the ISO and in many cases the shutter speed settings that you can control.
2.1. ISO
Increasing the ISO value in your camera settings improves the exposure of the photograph. The problem is that it also makes the photograph grainy.

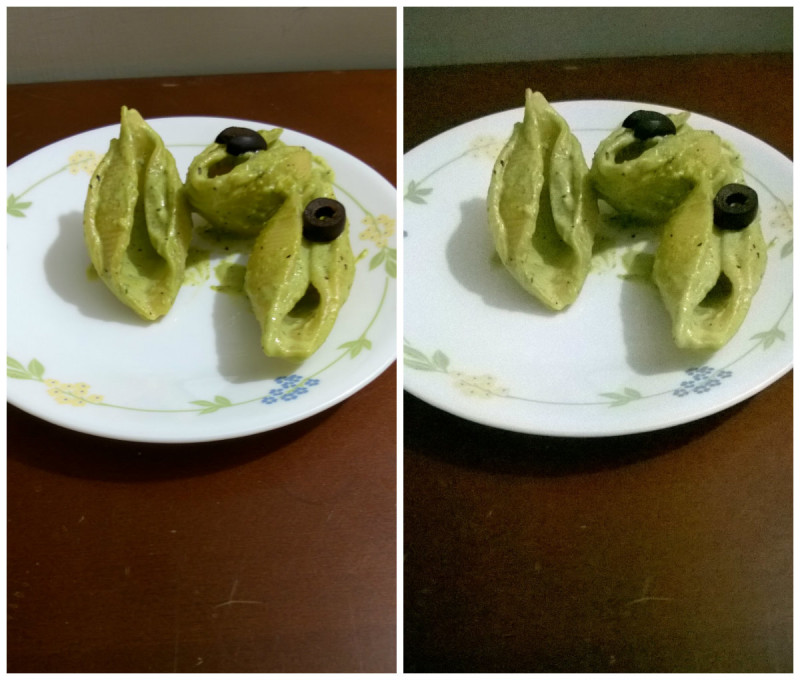
You can see in the above image that the photo on the right, taken with a higher ISO number is more grainy than the one on the left.
2.2. Shutter Speed
Similarly, a slower Shutter Speed allows more light to enter and increases the exposure.

The left most photo in the image has the Shutter-Speed set at Auto. I was not too happy with the exposure and tried a higher shutter speed to allow more exposure. But as you can see, it turned out to be too slow. Further adjusting the shutter to faster setting, reduced the exposure a bit, but it was still high. For example, the shutter speed of 1s indoors will probably give an over exposed photo, while that with 1/1800 will give an underexposed photo.
Again, there is no specific setting because your environment and the camera will be different from what I am using.
Try these combinations to get the best exposure in dark spots when you are in a dimly lit restaurant or in the deep woods.
3. Composition
Composition is an art that I haven’t dabbled in, yet. But as the word suggests, it refers to the number of elements in your photo. Too many elements clutter the photo, while too little make it uninteresting.
If you want the subject of your photo to stand out, you need just the right amount of elements that accentuate the subject, but at the same time, do not overwhelm the viewer.
One of the most discussed and advised approaches in photography is the Rule of Thirds, derived from the Golden Ratio that exists everywhere in Nature. Following this rule makes the visual composition more harmonious and pleasing to the viewer.
Food Photography Success
My days are fraught with hours of cooking over a hot stove, arranging and rearranging stuff on plates or bowls, taking hundreds of photos and then crying bitter tears because not a single one seems right. White Balance, Exposure, Composition, Styling (haven’t even touched on that beast yet) all seem pretty simple until you see the fruits of your labors, and realize they are bad.
I don’t want to be a Picasso. I just want to be good enough!
So this is it for now. Since I am still in learning mode myself, it is highly possible that I have miscomprehended something. Please don’t hesitate to correct me in that case.
A much talked about book in food photography is Lindsay Ostrom’s Tasty Food Photography. Check it out if you want to dive deeper into this topic.
Until I try and learn some more about food photography, stay tuned and happy clicking!
My story is quite similar…if you look at my older blog posts, the photos are quite baah types. But with so much stress on presentation these day (some sites even rejected my recipe as the photos were not good enuf), I had to polish my act….a few basic guidelines and I am able to take decent pics with my point and shoot camera….however I am getting a new DSLR..nothing fancy just the entry level types soon
Hey Sweta..it is nice to know that other fellow bloggers are going through the same thing..which camera are you planning to buy..pls keep me posted on where you buy, price etc. Would love to know your experience with it.
Food photography is one of the more difficult things about food blogging. Consider that you are the recipe developer, cook, dishwasher, food stylist, server, photographer and all at the same time.
Hey Dina…I like your photos…they are good and at the same time, there is stress on the recipe…And yes, the number of hats we wear….right?
Pragati – I can very much relate to your journey. I think the point should be that the food looks yummy and good enough in the pictures so that it entices other to make it.
Hello Jyoti, You are absolutely right..the photo should look appetizing…can be a challenge with some Indian dishes because many times the food tastes much better than in looks…and the different types of gravies — many look the same but the taste is so different…capturing that sentiment in a photo is a challenge.
thanks for your input!
It’s a very informative post Pragati, at least for me. I love cooking and of late I’m toying with the idea of starting a new blog featuring Bengali recipes. Thanks, I’ve gathered much knowledge from here… 🙂
Hey Maniparna…stop toying and start it already…I love Bong food..and always on the hunt for good vegetarian Bengali recipes which is probably rare…we definitely need more Bengali food bloggers..
thanks for joining..have you entered my giveaway yet? 😛
Awesome informative post! Especially for someone like me who loves photography 🙂 thanks for sharing Pragati 🙂
Archana, I think you are pretty good at it already 🙂 Maybe you can give Me some pointers 🙂
Thanks for coming in…have you checked my Giveaway?
Hmm, I guess it helps if your photos are beautiful, since this is what makes our mouths water. Food is such a highly visual topic that it’s difficult to grow a food blog, if the photos haven’t reached a “shareable level.”
There are some exceptions of the rule of course, like epicmealtime. But those guys found something else that stuck a lot with the audience.
Taking quality food photographs is very important. Visually tempting and appealing dishes can invite more people to try the dish. This article is giving a very good introduction for the beginners. Thank you so much for sharing.